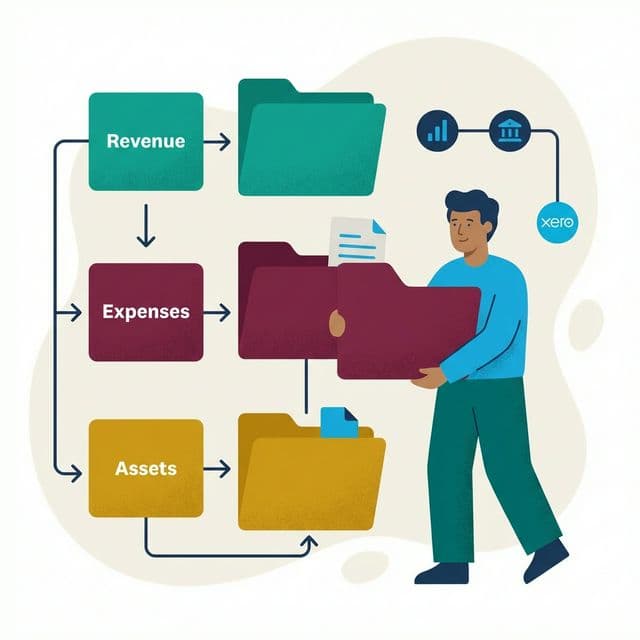
Xero tracking categories are tags that let you report Profit & Loss by business segment, such as location, department, service line, or project, without bloating your chart of accounts. Set them up under Accounting → Advanced → Tracking Categories, where Xero allows up to two categories with 100 options each. You then tag invoices, bills, and bank transactions, and run a P&L filtered by category to see which segments make money.
At a Glance
Most small business owners can tell you whether they made a profit last year. Far fewer can tell you which location, service line, or project generated that profit, and which ones lost money. Xero tracking categories solve this problem without requiring you to blow up your chart of accounts with hundreds of sub-accounts.
Tracking categories are tags you apply to transactions in Xero. You create up to two categories (such as "Location" and "Service Line"), each with up to 100 options (such as "Toronto," "Vancouver," "Calgary" under Location). When you enter an invoice, bill, or bank transaction, you select the relevant options. Then you run your Profit & Loss report filtered by tracking category and see exactly how each segment of your business is performing.
At LedgerLogic, we set up tracking categories for any client with more than one location, more than one service line, or more than one major project running simultaneously. The setup takes 10 to 20 minutes. The reporting value lasts the life of the business. If you are still setting up your Xero file, start with our chart of accounts guide, tracking categories build on a clean chart of accounts.
What Are Xero Tracking Categories (and What Are They Not)
Xero tracking categories are a way to add extra reporting dimensions to your transactions without creating additional accounts. They function like tags or labels.
What tracking categories are:
- A reporting tool, they let you filter your Profit & Loss by business segments
- Applied at the line-item level on invoices, bills, spend money transactions, receive money transactions, and manual journals
- Limited to 2 active categories at a time, with up to 100 options per category
What tracking categories are not:
- They are not a replacement for your chart of accounts, you still need proper accounts for each type of income and expense
- They are not available on balance sheet accounts (assets, liabilities, equity) in standard Xero reports
- They are not automated by default, you or your bookkeeper must select the tracking option on each transaction (though bank rules can automate this for recurring transactions)
The two-category limit is intentional. Xero's philosophy is to keep things simple. Two well-chosen tracking categories give you a two-dimensional view of your business: for example, "How does each location perform?" and "How does each service line perform?" That covers most small business reporting needs. If you need more dimensions, the solution is usually a reporting add-on (like Syft Analytics or Spotlight Reporting) rather than forcing more complexity into your Xero file.
How to Choose Your Two Tracking Categories
This is the most important decision, and it is worth spending 15 minutes thinking about before you start clicking in Xero. You only get two, so they need to count.
Ask yourself: "What dimension of my business do I most want to see in my Profit & Loss?" Here are the most common combinations we set up for Canadian clients:
- Category 1: Location (Toronto, Vancouver, Calgary, etc.)
- Category 2: Department (Sales, Operations, Administration) or Service Line
This lets you answer: "Is the Vancouver office profitable?" and "What does sales cost at each location?"
- Category 1: Client or Project
- Category 2: Service Line (Consulting, Audit, Tax, Advisory)
This lets you answer: "Is Client X profitable?" and "Which service line has the best margin?"
- Category 1: Sales Channel (Shopify, Amazon, Wholesale, In-Store)
- Category 2: Product Category or Brand
This lets you answer: "What is our Amazon margin vs Shopify margin?" and "Which product category drives the most revenue?"
- Category 1: Project or Job
- Category 2: Cost Type (Labour, Materials, Subcontractors)
This lets you answer: "Is this job on budget?" and "What proportion of our costs are subcontractor vs in-house labour?"
CPA tip: The biggest mistake we see is choosing categories that are too granular. If you have 80 clients, creating a tracking category with 80 options makes data entry tedious and reports overwhelming. Instead, group clients into tiers or categories (e.g., "Enterprise," "Mid-Market," "Small Business") or track only your top 10 to 15 clients individually and group the rest as "Other." The goal is insight, not exhaustive categorisation.
How to Set Up Tracking Categories in Xero (Step by Step)
The setup is straightforward. Here is the process.
Step 1: Navigate to tracking categories. Go to Accounting → Advanced → Tracking Categories. You will see any existing categories listed, or an empty state if none exist.
Step 2: Create your first tracking category. Click "Add Tracking Category." Enter a clear, descriptive name, "Location," "Department," "Service Line," or whatever you decided in the previous section. Keep it short because this name appears in dropdown menus throughout Xero.
Step 3: Add your options. Below the category name, add the individual options. For a "Location" category, these would be your business locations: Toronto, Vancouver, Calgary, etc. For "Department," these might be Sales, Operations, Marketing, Administration.
A few rules to follow when adding options:
- Keep the total number manageable. Under 20 options per category is ideal. Over 50 becomes unwieldy.
- Use consistent naming conventions. "Toronto, Downtown" and "Toronto Downtown" are different options in Xero. Decide on a format and stick to it.
- Plan for growth. If you are about to open a new location, add it now even if you do not have transactions yet.
Step 4: Repeat for your second category (if using two).
Step 5: Start applying tracking to transactions. Once tracking categories are active, you will see dropdown fields on every new transaction in Xero, invoices, bills, spend money, receive money, manual journals. Select the relevant option for each line item. If a transaction spans multiple tracking options (e.g., an expense that applies to both Toronto and Vancouver), you can split the line item and assign different options to each portion.
Step 6: Set up bank rules with tracking options. For recurring transactions that always belong to the same tracking option, set the option in your bank rule. For example, if your Toronto office rent is always the same payee and amount, create a bank rule that codes it to Rent (expense), assigns the "Toronto" tracking option, and applies the correct GST/HST rate. One click to reconcile, correctly tracked every time.
Running Reports by Tracking Category
This is where the value of tracking categories becomes tangible. You set them up so you can see reports like these.
Profit & Loss by Tracking Category. Go to Accounting → Reports → Profit and Loss. In the report settings, you will see a filter for each active tracking category. Select the category you want to analyse by. Xero generates a P&L with each tracking option displayed as a separate column. This is the single most useful report in Xero for multi-segment businesses.
What this report tells you: Revenue, cost of sales, gross margin, operating expenses, and net profit for each location, department, client, or project, all on one page. You can immediately see which segments are profitable and which are consuming resources.
Profit & Loss comparison across tracking options. The default P&L by tracking category shows all options side by side. You can also run a standard P&L filtered to a single tracking option (e.g., just "Toronto") for a detailed drill-down.
Budget vs Actuals by tracking option. If you set up budgets in Xero's Budget Manager with tracking categories, you can compare budgeted vs actual performance for each segment. This is particularly useful for project-based businesses or businesses with location-level targets.
Export to Excel for deeper analysis. Any report filtered by tracking category can be exported to Excel (CSV or XLSX). If your analysis needs go beyond what Xero's built-in reports offer, pivot tables, custom charts, or multi-period comparisons, the export gives you the raw data to work with. For broader financial management, see our virtual CFO services.
CPA tip: Run your P&L by tracking category monthly, not just at year-end. Segment profitability problems compound over time. A location losing $2,000 per month is $24,000 per year, catching it in February gives you 10 months to fix it. Catching it at year-end means the money is already gone.
Tracking Categories vs Sub-Accounts: When to Use Which
This comes up in almost every client setup conversation, and the answer is clear for most businesses.
Use tracking categories when you want to see P&L performance by segment without multiplying your chart of accounts. If you have 3 locations and 25 expense accounts, tracking categories give you the same reporting with 25 accounts plus a 3-option tracking category. Sub-accounts would require 75 accounts (3 locations × 25 expenses).
Use sub-accounts when you need the segmentation to appear directly on your trial balance or balance sheet, or when you need segment data that integrates with external systems that cannot read tracking categories.
The practical test: If the question you want to answer starts with "How much profit did [segment] make?" use tracking categories. If the question starts with "What is the balance of [specific asset or liability] for [segment]?" you may need sub-accounts.
For how to structure your accounts to work well alongside tracking categories, see our chart of accounts guide. The two features complement each other, a clean chart of accounts with well-chosen tracking categories gives you both high-level P&L clarity and granular cost analysis.
Want Xero Set Up Right the First Time?
You already use Xero, our CPA team makes sure it is configured correctly: chart of accounts, bank rules, GST/HST codes, and Hubdoc, so your books stay clean and CRA-ready.
Common Tracking Category Mistakes (and How to Avoid Them)
Choosing categories that are too granular. If your tracking category has 60 options, nobody wants to scroll through a 60-column P&L report and nobody wants to pick from a 60-item dropdown on every transaction. Keep options under 20 where possible. Group similar items.
Not tagging transactions consistently. Tracking categories only work if every transaction is tagged. If 30% of your expenses have no tracking option assigned, your segmented reports are inaccurate. The fix: make tracking assignment part of your reconciliation workflow, use bank rules to automate recurring transactions, and periodically run the Account Transactions report filtered to "(No Tracking)" to find untagged items.
Using tracking categories for something that belongs in the chart of accounts. Tracking categories are for reporting dimensions, they answer "where" or "what part of the business." They are not a substitute for proper expense categorisation. "Office Supplies" and "Travel" are chart of accounts categories. "Toronto" and "Vancouver" are tracking category options. Mixing these up leads to messy reports.
Forgetting to assign tracking on manual journals. If your accountant posts adjusting journal entries at year-end, those entries need tracking options assigned. Otherwise, the adjustments appear in the "(No Tracking)" column and distort your segment analysis. Make sure your accountant knows which categories are in use.
Not planning for changes. You can rename tracking options and add new ones at any time, but you cannot merge two options together without manually editing every transaction tagged with the old option. If you anticipate that "Toronto East" and "Toronto West" might eventually consolidate into just "Toronto," start with "Toronto" and skip the sub-locations.
Frequently Asked Questions
How many tracking categories can I have in Xero?
Xero allows a maximum of two active tracking categories at any time, with up to 100 options per category. If you need more than two dimensions, use a combination of tracking categories, chart of accounts structure, and reporting add-ons. Two well-chosen categories cover most small business needs.
Can I apply tracking categories to existing transactions in Xero?
Yes. You can edit existing invoices, bills, spend money entries, and manual journals to add or change tracking options. However, there is no bulk-edit feature, so retroactively tagging a large volume of past transactions is time-consuming. We recommend starting tracking from the current period forward rather than attempting to tag your entire history. If historical segmentation is needed, your accountant can post summary journal entries.
Should I use tracking categories or sub-accounts?
Tracking categories are the better choice for most P&L analysis. They give you the same segmented reporting without multiplying your chart of accounts. The exception: if you need segment data on the balance sheet or trial balance, sub-accounts may be necessary. For more detail, see our chart of accounts guide.
Do tracking categories work with bank rules?
Yes. You can assign a tracking category option within a bank rule. When the rule fires, the transaction is coded to the correct account and tagged with the correct tracking option automatically. This is the most effective way to ensure consistent tracking on recurring transactions.
Can I use tracking categories on balance sheet accounts?
Xero tracking categories work primarily with P&L accounts (income and expenses). Balance sheet accounts do not support tracking on standard transactions. If you need balance sheet segmentation (e.g., receivables by location), use sub-accounts or a reporting add-on.
What reports can I filter by tracking category in Xero?
The main reports are the Profit and Loss Statement, Profit and Loss by Tracking Category (comparison), Budget Manager, and Account Transactions. All can be exported to Excel. The P&L by Tracking Category comparison report is the most powerful, it shows all options side by side so you can compare segment performance at a glance.

Sebastien ProstCPA, Ex-CRA
Licensed CPA with 10+ years of experience, including work with the Canada Revenue Agency. Founder of LedgerLogic, a cloud accounting firm serving Canadian SMEs. Xero Certified Advisor.