At a Glance
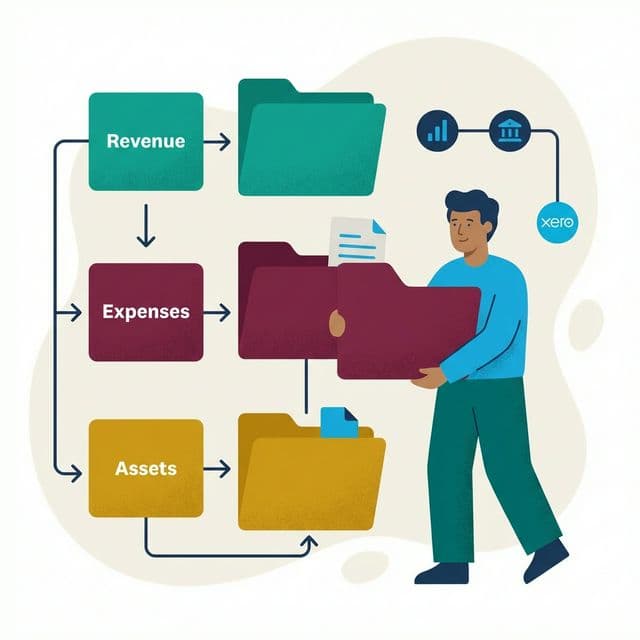
Your Xero chart of accounts is the foundation of every financial report your business produces. If it is messy, your reports are unreliable. If it is too complex, your bookkeeping takes twice as long as it should. If it is missing key Canadian tax accounts, your GST/HST filing will be wrong.
We set up and clean up Xero charts of accounts for Canadian businesses every week at LedgerLogic. The most common problem we see is not a lack of accounts — it is too many. Business owners create 150 expense categories, never use most of them, and then wonder why their Profit and Loss report is 4 pages long and impossible to read.
This guide walks through how to set up your Xero chart of accounts template for Canada correctly from the start, including industry-specific recommendations for service businesses, e-commerce sellers, and construction companies. If you are migrating from another system and need to rebuild your chart of accounts in the process, our QuickBooks to Xero migration guide and Sage to Xero migration guide both cover chart of accounts mapping during the conversion.
Why Your Chart of Accounts Matters More Than You Think
A chart of accounts is not just an accounting requirement. It is the organising structure that determines what your financial reports actually show you. Every transaction you record in Xero gets assigned to an account, and those accounts roll up into your Profit and Loss, Balance Sheet, and cash flow statements.
When the chart of accounts is set up well, your reports tell you useful things: which revenue streams are growing, which expense categories are increasing, and where your cash is going. When it is set up poorly — too many accounts, wrong account types, missing tax codes — your reports become noise. You end up making decisions based on inaccurate or confusing numbers.
The other practical consequence is time. During bank rules reconciliation, Xero asks you to assign each transaction to an account. If your chart of accounts has 200 options, you spend unnecessary time scrolling and deciding. If it has 40 well-named accounts with sensible defaults, reconciliation goes faster. This is one of the reasons bank rules are so effective — they work best when your chart of accounts is clean and consistent.
Xero’s Default Canadian Chart of Accounts: What You Get Out of the Box
When you create a new Xero organisation and select Canada as your country, Xero generates a default chart of accounts with standard Canadian account categories. This template is a reasonable starting point, but it is built for a generic business. You will want to customise it for your specific industry and reporting needs.
The default Canadian template includes accounts organised under the five main types:
- Assets — Bank accounts, accounts receivable, prepaid expenses, fixed assets (equipment, vehicles, property), and accumulated depreciation accounts. The template includes a generic "Office Equipment" and "Computer Equipment" account. Most small businesses will keep these.
- Liabilities — Accounts payable, GST/HST payable, PST payable (if applicable), payroll liabilities (CPP, EI, income tax deductions), credit card accounts, and loan accounts. The tax liability accounts are pre-configured for Canada, which is helpful.
- Equity — Owner’s equity, retained earnings, owner contributions, and owner drawings. If you are incorporated, you will see share capital and retained earnings instead.
- Revenue — A generic "Sales" account and "Interest Income." Most businesses need to customise this section to reflect their actual revenue streams — particularly if you sell through multiple channels or offer distinct service lines.
- Expenses — This is where the default template is most generic. It includes standard categories like advertising, bank fees, insurance, office expenses, professional fees, rent, telephone, travel, and utilities. For many businesses, these defaults are either too broad or missing industry-specific categories.
CPA tip: Do not accept the defaults blindly, but also do not overhaul everything on day one. Start with the default template, run your business for a month, and then evaluate which accounts you actually use. Archive the ones you do not. Add the ones you need. The worst approach is trying to anticipate every possible account before you have any real transaction data.
Want Xero Set Up Right the First Time?
You already use Xero, our CPA team makes sure it is configured correctly: chart of accounts, bank rules, GST/HST codes, and Hubdoc, so your books stay clean and CRA-ready.
How to Customise Your Chart of Accounts in Xero (Step by Step)
Here is the process we follow when setting up a chart of accounts for a Canadian client in Xero.
Step 1: Navigate to Accounting → Chart of Accounts. This shows you all current accounts, organised by type. You can sort by account code, name, or type.
Step 2: Review existing accounts and archive unused ones. Go through the default accounts and ask: "Will I post transactions to this account at least once a month?" If the answer is no, archive it. You can always un-archive later. Archiving keeps your active account list lean, which speeds up reconciliation and reduces errors.
Step 3: Add accounts specific to your business. Click "Add Account" and fill in the details: a numeric code (we recommend a consistent numbering system — 100s for assets, 200s for liabilities, 300s for equity, 400s for revenue, 500s for cost of sales, 600s for operating expenses), a descriptive name, the correct account type, and a brief description. Keep names clear and consistent. "Software Subscriptions" is better than "SaaS Tools + Apps."
Step 4: Set correct tax rates for each account. This is critical for Canadian businesses. Every account should have a default tax rate assigned. Revenue accounts for taxable sales should default to your province’s GST/HST rate. Expense accounts should default to the tax rate you typically pay on that type of purchase. Bank fee accounts should default to "No Tax." This one setting saves significant time during reconciliation because Xero pre-fills the tax rate based on the account you select. For the full walkthrough on getting your tax rates right, see our GST/HST setup guide for Xero.
Step 5: Set up tracking categories for departments or locations. Instead of creating separate accounts for "Toronto Office Rent" and "Vancouver Office Rent," create a single "Rent" expense account and use a tracking category called "Location" with "Toronto" and "Vancouver" as options. This keeps your chart of accounts simple while still allowing you to run reports by location. Our tracking categories guide covers this in detail, including when tracking categories make sense versus when you actually need a separate Xero organisation.
Step 6: Map report codes if your accountant uses custom report templates. If you work with a CPA firm that uses Xero HQ (as we do at LedgerLogic), they may have custom chart of accounts templates with pre-mapped report codes. These ensure your financial statements follow a consistent structure across clients. Ask your accountant whether they have a preferred template before spending time customising from scratch. Note: Xero HQ chart of accounts templates are now available in Canada.
CPA tip: If you are working with an accountant, ask them to set up the chart of accounts for you using Xero HQ’s regional template feature. It is faster and ensures your reports map correctly from day one. This is one of the most valuable parts of our Xero setup service — we configure the chart of accounts, tax rates, and bank feeds so clients start with a clean, well-structured file.
Industry-Specific Chart of Accounts Templates for Canadian Businesses
The default Xero template works for a generic business, but most businesses are not generic. Here are simplified chart of accounts recommendations for three common business types we work with. These are guidelines, not one-size-fits-all prescriptions — your specific situation may require modifications.
Service Businesses (Agencies, Consultants, Freelancers)
Service businesses tend to have simple cost structures: most expenses are people, software, and overhead. The chart of accounts should reflect this.
Revenue Accounts:
| Code | Account Name | Type | Default Tax |
|---|---|---|---|
| 400 | Consulting Revenue | Revenue | HST/GST on Income |
| 401 | Project Revenue | Revenue | HST/GST on Income |
| 410 | Reimbursable Expenses Billed | Revenue | HST/GST on Income |
Cost of Sales:
| Code | Account Name | Type | Default Tax |
|---|---|---|---|
| 500 | Subcontractor Costs | Direct Costs | HST/GST on Expenses |
| 510 | Project Materials | Direct Costs | HST/GST on Expenses |
Operating Expenses (key additions to defaults):
| Code | Account Name | Type | Default Tax |
|---|---|---|---|
| 600 | Advertising and Marketing | Expense | HST/GST on Expenses |
| 605 | Bank and Payment Processing Fees | Expense | No Tax |
| 610 | Insurance | Expense | Tax Exempt |
| 615 | Office Expenses | Expense | HST/GST on Expenses |
| 620 | Professional Development | Expense | HST/GST on Expenses |
| 625 | Professional Fees (Legal, Accounting) | Expense | HST/GST on Expenses |
| 630 | Rent | Expense | Varies (see note) |
| 635 | Software Subscriptions | Expense | HST/GST on Expenses |
| 640 | Telephone and Internet | Expense | HST/GST on Expenses |
| 645 | Travel | Expense | HST/GST on Expenses |
| 650 | Meals and Entertainment (50%) | Expense | HST/GST on Expenses |
Note on rent: If your landlord is a GST/HST registrant, commercial rent is subject to GST/HST. If they are not registered (revenue under $30,000), it is not. Set the default based on your specific situation.
E-commerce Businesses (Shopify, Amazon, WooCommerce)
E-commerce businesses need more granular cost of sales tracking and should separate revenue by channel. This is the business type where the chart of accounts matters most for profitability analysis.
Revenue Accounts:
| Code | Account Name | Type | Default Tax |
|---|---|---|---|
| 400 | Sales — Shopify | Revenue | HST/GST on Income |
| 401 | Sales — Amazon | Revenue | HST/GST on Income |
| 402 | Sales — Wholesale | Revenue | HST/GST on Income |
| 410 | Shipping Revenue | Revenue | HST/GST on Income |
| 420 | Returns and Refunds | Revenue | HST/GST on Income |
Cost of Sales (critical for margin analysis):
| Code | Account Name | Type | Default Tax |
|---|---|---|---|
| 500 | Product Cost (COGS) | Direct Costs | Varies |
| 505 | Shipping and Fulfilment | Direct Costs | HST/GST on Expenses |
| 510 | Marketplace Fees (Amazon, Shopify) | Direct Costs | HST/GST on Expenses |
| 515 | Packaging Materials | Direct Costs | HST/GST on Expenses |
| 520 | Customs and Duties | Direct Costs | No Tax |
| 525 | Inventory Adjustments | Direct Costs | No Tax |
CPA tip: Separating marketplace fees from product cost is essential for understanding your true margins by channel. If you lump Amazon referral fees into the same bucket as your product cost, you cannot see which channel is actually more profitable. If you sell on Shopify and Amazon, also consider our resources on e-commerce accounting.
Construction and Trades
Construction businesses need job costing, materials tracking, and holdback receivable accounts — none of which are in the default Xero template.
Revenue Accounts:
| Code | Account Name | Type | Default Tax |
|---|---|---|---|
| 400 | Contract Revenue | Revenue | HST/GST on Income |
| 410 | Change Order Revenue | Revenue | HST/GST on Income |
Cost of Sales:
| Code | Account Name | Type | Default Tax |
|---|---|---|---|
| 500 | Materials | Direct Costs | HST/GST on Expenses |
| 510 | Subcontractor Costs | Direct Costs | HST/GST on Expenses |
| 520 | Equipment Rental | Direct Costs | HST/GST on Expenses |
| 530 | Direct Labour | Direct Costs | No Tax |
| 540 | Permits and Inspections | Direct Costs | HST/GST on Expenses |
Key balance sheet additions:
| Code | Account Name | Type | Default Tax |
|---|---|---|---|
| 130 | Holdback Receivable | Current Asset | No Tax |
| 230 | Holdback Payable | Current Liability | No Tax |
| 135 | Work in Progress (WIP) | Current Asset | No Tax |
Note: Holdback receivable is a Canadian construction industry standard — typically 10% of each progress billing is held back until substantial completion. If your Xero file does not have this account, your AR will be overstated and your cash flow projections will be wrong.
Canadian Tax Accounts You Must Have in Xero
Regardless of your industry, every Canadian business using Xero needs certain tax-related accounts configured correctly. Missing or misconfigured tax accounts leads directly to incorrect tax filings.
GST/HST Accounts:
- GST/HST Receivable (Input Tax Credits) — This tracks the GST/HST you pay on business purchases that you can claim back from CRA. Xero creates this automatically when you select Canada as your country, but verify it is active and correctly named.
- GST/HST Payable — This tracks the GST/HST you collect from customers that you owe to CRA. Again, Xero creates this by default. The balance of this account minus your ITC account should approximate what you owe (or are owed) on your next GST/HST return.
Provincial Tax Accounts (if applicable):
- PST Payable — Required if you operate in or sell into British Columbia (7%), Saskatchewan (6%), or Manitoba (7% RST). Note that as of January 1, 2026, Manitoba’s RST also applies to cloud computing services, software subscriptions, and data storage.
- QST Payable — Required if you operate in or sell into Quebec (9.975% QST). QST is administered by Revenu Québec, not CRA, which means separate registration and filing.
Payroll Liability Accounts:
- CPP Payable — Canada Pension Plan contributions (both employee and employer portions).
- EI Payable — Employment Insurance premiums (both employee and employer portions).
- Income Tax Payable — Federal and provincial income tax deducted from employee pay.
- WSIB/WCB Payable — Workers’ compensation premiums. The account name varies by province (WSIB in Ontario, WCB in most other provinces, CNESST in Quebec).
- Vacation Pay Payable — Accrued vacation pay owed to employees.
For the complete walkthrough on configuring tax rates in Xero, including multi-province setups, see our GST/HST setup guide. For current rates, reference our GST/HST rates by province page.
Common Chart of Accounts Mistakes in Xero (and How to Fix Them)
These are the issues we encounter most often when reviewing new clients’ Xero files.
The "100 expense categories" problem. The most common mistake by far. Business owners create hyper-specific expense accounts — "Office Supplies — Paper," "Office Supplies — Toner," "Office Supplies — Pens" — that they never report on individually. The result is a P&L that runs 4 pages long with dozens of accounts that each have $50 in them. The fix: merge related accounts and use one "Office Supplies" account. If you genuinely need to track spending by subcategory, use Xero’s description field on individual transactions rather than separate accounts.
Wrong account types. We occasionally see revenue posted to expense accounts or vice versa. This happens when someone creates an account and selects the wrong type from the dropdown. It is easy to do and hard to spot unless you review your chart of accounts regularly. The consequence: your gross profit and net income calculations are wrong. The fix: review each account’s type and correct any mismatches. You cannot change an account’s type in Xero once it has transactions — you will need to create a new account with the correct type, recode the transactions, and archive the old one.
Missing tax codes on accounts. When accounts do not have a default tax rate assigned, Xero either applies no tax or prompts you to select one for every transaction. This slows down reconciliation and increases the risk of posting the wrong tax rate. The fix: go through every account and set an appropriate default. Revenue accounts should default to your applicable GST/HST rate. Most expense accounts should as well, except bank fees (No Tax), insurance premiums (Tax Exempt), and salaries/wages (No Tax).
Not using tracking categories. Creating "Toronto Office Rent" and "Vancouver Office Rent" as separate accounts instead of one "Rent" account with a "Location" tracking category is a common structural error. It makes your chart of accounts longer without making your reports better. In fact, it makes reports worse because you cannot easily see total rent across locations. The fix: consolidate into single accounts and use tracking categories to slice the data.
Mixing personal and business transactions. Every incorporated Canadian business needs an owner’s draw/shareholder loan account. Every sole proprietor needs an owner’s contributions and owner’s drawings account. Without these, personal transactions end up coded to random expense accounts, which distorts your P&L and creates tax problems. If your accountant finds personal expenses scattered across your business accounts at year-end, it costs you time and money to sort out.
Frequently Asked Questions
How many accounts should I have in my Xero chart of accounts?
For most Canadian small businesses, 30 to 50 accounts is the right range. Larger or more complex businesses might need 60 to 80. If you have more than 100 active accounts, you almost certainly have too many. Every account you add makes your reports longer and reconciliation slower. The test: if you cannot remember what an account is for without reading its description, you probably do not need it as a separate account. Start lean and add only when you have a clear reporting reason to do so.
Can I change my chart of accounts after I start using Xero?
Yes. You can add, rename, and archive accounts at any time. You cannot delete an account that has transactions posted to it, but you can archive it — the historical data is preserved, and the account disappears from your active list. If you need to merge two accounts, recode the transactions from one to the other using Xero’s "Find and Recode" feature, then archive the empty account. Major chart of accounts restructuring is best done at the start of a new fiscal year.
What is the difference between account codes and account names in Xero?
Account codes are numeric identifiers (up to 10 characters) that control the sort order of accounts on your reports. Account names are the descriptive labels. For example, code 400 might be named "Sales Revenue" and code 610 might be "Office Expenses." Xero sorts accounts by code within each account type, so a logical numbering system (100s for assets, 200s for liabilities, 300s for equity, 400s for revenue, 500–599 for cost of sales, 600+ for operating expenses) makes your reports cleaner.
Should I use sub-accounts or tracking categories in Xero?
Xero does not support sub-accounts the way QuickBooks does. Use tracking categories instead to segment your data by department, location, or project. The rule of thumb: your chart of accounts answers "what type of money is this?" (rent, software, travel) while tracking categories answer "which part of the business does this belong to?" (Toronto office, Vancouver office). For example, create one "Rent" account and one "Location" tracking category rather than two separate rent accounts. See our tracking categories guide for the full setup walkthrough and decision framework.
How do I set up GST/HST accounts in Xero for Canadian businesses?
When you create a Xero organisation with Canada as your country, the system automatically creates GST/HST liability accounts. Verify that the correct tax rates are active for your province: HST for Ontario, New Brunswick, Nova Scotia, PEI, and Newfoundland; GST+PST for British Columbia, Saskatchewan, and Manitoba; GST+QST for Quebec; GST only for Alberta and the territories. Then set default tax rates on each account in your chart of accounts so transactions are coded correctly during reconciliation. Our complete GST/HST setup guide walks through every step.

Seb ProstCPA, Ex-CRA
Licensed CPA with 10+ years of experience, including work with the Canada Revenue Agency. Founder of LedgerLogic, a cloud accounting firm serving Canadian SMEs. Xero Certified Advisor.